2019年5月28日星期二

Ovonic Memorial Day Deal for LiPo Batteries, Up to 50% off

Memorial Day, also known as Decoration Day is an important and meaningful holiday for us American. It’s the great day not only to honor those who have lost their lives while serving in the U.S. armed forces but also to spend with your family and friends. Besides, it’s usually regarded as the start of the summer season.
memorial-day-sale
But except for these activities, what else can we do? Exactly, RC hobby is a perfect option for you. Flying your RC airplane with your children and sharing the stories that happened in the war with your family. That is really a good way to pay tribute to those who have lost their lives fighting for our country and spend meaningful time with our family.
Therefore, for the important Memorial Day, Ampow gives the best Memorial day sales 2019 and provides an Extreme Deal for RC hobby batteries. Good news for us Hobbyists! This activity will last 10 days from 27th May to 5th June.

Buy 3 Get 1 Free: FPV Batteries

image
If you buy 3 packs of FPV batteries, you will get a free one. FPV batteries cover Ovonic 1300mah to 1550mah, from 3S to 6S.

Up to 50% off for RC Airplane Batteries

In addition, there is a great discount and airplane batteries. Especially for RC airplane batteries, You’ll save a whopping 50%. great deals on battery for small foam plane, park flyer, glider, X-class drone, and 64mm-80mm EDF jet and more. So What are you still waiting for?

Great deal on RC Car Batteries

Last but not least, for RC car, here are most popular 2s lipo batteries such as Ovonic 5000mah/5200mah 2s for your 1/10 and some of 1/8 RC car trucks, such as short course, monster truck, buggy etc.
image
As to 3s, there also have great deals like 4500mah 3s,5200mah 3s,5500mah 3s. 4500mah 3s with 135mm*40mm*25mm(L*W*H) battery dimension for most of 1/10 monster truck, crawler etc.
5500mah 3s with a larger capacity and longer size(155mm of length), great for some model with larger battery tray, such as 1/10 slash, E-Revo, 1/8 axial yeti, etc. 5200mah 3s with EC3 can be fit for most of losi 1/10 truck.

2019年5月12日星期日

A Profile of Ovonic Brand

Ovonic, founded in 2017, aims to build a direct to customer online battery brand and to create an easier solution for newcomers to break into the RC world. Ovonic prides itself withthe best prices and multi-choice of batteries to power up all forms of RC’s from land to air.


OVONIC Batteries


Company Mission
Our mission is to bring real fun to this community without the high price tag. With our high discharge, high quality, and great prices, our batteries will allow every hobbyist to enjoy the incredible power, speed, and pleasure while playing with their friends or even training alone.


Committed to Solving Issues
Not only are we committed to the high quality of our batteries but we also prioritize our RC related issues by keeping knit bonds with RC hobbyists. We take serious consideration of the ever-changing needs of our customers and constantly strive to improve our batteries for our community.


Team Ovonic
We love RC and everyone and anyone who loves RC. We built an amazing team - Team Ovonic. Who are our members? David Graves, Jeff Bates, Luiz Rena Meireles - fpv, Mako Reactra, and Justin Kent Furnis! They love the RC community and are constantly challenge themselves to keep improving and to push the boundaries of FPV further. We will announce more pilots and drivers in the coming days. Now, let’s tackle different types of challenges ahead of us together, so that we may grow and improves a team!

Overview
As an emerging battery brand, Ovonic has been lucky enough to be recognized by RC hobbyists that we are a trustworthy and high-quality brand. All we ask is people to give our batteries a try, and most people are impressed with the high performance and the amazing price point.

The source from: https://www.ampow.com/about-us

2019年4月23日星期二

The Fixed Wing FPV Buying Guide

Love them or hate them, drones are everywhere these days and while they may have drawn a bit more attention and scrutiny to the RC airplane pilots, they have also brought us FPV. First Person View flight from a 250 quad racer is exhilarating, to say the least, almost to the point of motion sickness! However, soaring gracefully at an altitude above your flying field while piloting your craft “from the cockpit” opens up a whole new world of fun and enjoyment for us fixed wing types. Whether you’re into thermalling with a warmliner, grabbing some great HD video or ripping some pylons up at the speed course, these items are sure to give you what you need in the FPV department.

ORIGIN HOBBYtowerhobbies.com, (217) 398-3636
SKYHUNTER FPV KIT
With a wingspan of 71 inches, the Skyhunter from Origin Hobby might not be your average park flyer, but it’s as easy to use as any of them. Distributed by Tower Hobbies, this purpose-built for FPV flying model has a removable canopy to mount your camera gear and a payload capacity that would make any heavy-lift tug blush. Other features include a pusher prop, dual FRP (Fiber Reinforced Plastic) booms and the ability to accommodate for a variety of different LiPo packs. Able to use up to a 20,000mAh 4S pack for power, flight times are extended, to say the least. Split the difference and use a 10,000mAh LiPo to make room for HD camera gear or other peripherals. The control surfaces consist of only an elevator and ailerons to keep focused on the flying from the pilot’s seat. Not only that, but the generous wing area allows for some excellent slope soaring once you’ve gotten your fill of capturing FPV HD clips. The EPO foam construction makes for quick and easy repairs while the two-piece wing simplifies transport and storage. Field assembly is also a breeze. Place the wings together on the spar, attach four screws and you’re ready to take to the skies. Price- $129.99
TEAM BASEMENT RCtbrcwings.com, (902) 840-3397
REFLEX 38

Fixed wing FPV racing is one of the fastest growing segments of the UAV racing sport and TBRC has been at the forefront of it since day one. The TBRC Reflex 38 is the newest plane to take to the skies. It’s custom designed aerofoil and unique winglets make this craft the ideal race plane. The exceptional high-speed handling and the extreme durability of the foam construction make it love for many FPV racing pilots out there. The TBRC Reflex has won the NAFPV 2015 wing race and the Fatshark Frenzy 2015 wing race. The TBRC Reflex has a 38” wingspan and is made of durable EPP foam. The kit comes supplied with the foam, spars, winglets, elevons, equipment bay hatch and 3mm laminate. The large battery bay allows you to put in a variety of batteries to suit your flying style. The battery bay also includes a unique shelf, or secret compartment, at the back which allows you to tuck your wires out of the way leading to a cleaner setup and more space for components. Price- $135.00
TRICK RC
zagi.com, (360) 275-6853
ZAGI HP-60 W/3100KV MOTOR The evolution of the Zagi model moved naturally from hobbyists to a commercial and military UAV (unmanned aerial vehicle) training tool. NASA Ames, the US Navy, and many public/private schools and universities use the Zagi-60 to introduce students to UAV and FPV flight. The Zagi-60 design has expanded into the emerging FPV (first person view) market for research using FPV for military and civilian research. The Zagi HP-60 is graceful and fast flying 60-inch wing. This flying wing has lower wing loading making it a good camera platform and for UAV and FPV applications. The design offers lower wing loading for improved thermal performance and lower landing speed. More span improves stability too. Expand your fly zone with the five-foot flying wing. Whether you’re performing aerial mapping flights or giant scale FPV racing, the Zagi has got you covered and Trick RC serves them up in a variety of sizes. The special ingredient to the Zagi “sauce”, so to speak? The 3100Kv inrunner brushless motor. Using a ubiquitous 3S 2200mAh LiPo, you’re looking at a far stretch over 30,000 RPM. Now that’s cookin’ with gas! Price- $149.88


FATSHARK
hobbywireless.com, (210) 267-1421
PAN/ROLL/TILT CAMERA MOUNT Let’s say you’re a fixed wing type of guy who is looking to get into the FPV scene, but you’re a little weary of the fact that the camera is fixed. Perhaps you’re a seasoned formation pilot who is itching to get that much closer to your wingman. Heck, just being able to look in any direction while flying by yourself is enough of a selling point for a head tracker system. This unit from the leader in FPV, Fatshark, is sure to please, no matter what your application. Fatshark has introduced it’s new 3-Axis pan, tilt and roll Camera Mount System to go along with their revolutionary 3-Axis Trinity head tracker. Utilizing a high-speed metal gear base (pan) servo and 2 high-speed tilt and roll servos, the mount matches Trinity’s rapid motion capabilities perfectly. The System comes with 2 camera mounts, one for the fatshark 600tvl CMOS (20mm) and a second for 25mm cameras such as the new fatshark 420CCD V2. You do need the Trinity External Head Tracker module to use the camera mount to it’s fullest potential, but as the two of them ring in at less than 200 bucks combined, purchasing both of them is a no-brainer. Price- $49.50

HOBBYKING
hobbyking.com
HOBBY KING CLOUD SURFER EPO FPV GLIDER W/FLAPS PnP
Building on the already established ability of our purpose built Sky Eye as an FPV glider, our designers have pulled out all the stops to improve the original’s flying qualities and delivered the goods with the Cloud Surfer. The new T-tail configuration allows for improved stability and flight control responsiveness, both being primary concerns with any FPV camera platform especially in the slow speed flight envelope and the new look has been made even more distinctive by its sleek grey finish. This is a BIG model that boasts a huge 2-meter wingspan, but that said, there is no need to worry about getting the Cloud Surfer to your flying site. It has a two-piece plug-in wing assembly system enabling it to be transported in almost any motor vehicle and once at your destination, is easy and quick to assemble. Bigger flies better and this is especially true with FPV glider platforms and you can bet that the Cloud Surfer certainly fits the bill here. A huge wing area coupled with pre-installed flaps ensures stable and almost un-stallable flight which is exactly what you are looking for as an FPV pilot. Price- $77.59
SPEKTRUM RC
spektrumrc.com, (217) 352-1913
ULTRA MICRO FPV SYSTEM WITH HEADSET 
Used to be, if you wanted to experience FPV (First Person View) flight, you had to piece together a system yourself. Once you did, you then had to figure out how to make everything work together. The Spektrum VS1100 Ultra Micro FPV System eliminates all the guesswork by giving you everything you need in one box. Camera, headset, batteries, charger – it’s all there, all compatible and can be ready to go in minutes. This amazing bit of Spektrum technology combines an FPV camera, transmitter, and antenna in a single unit no bigger than a thimble. Installation is easy and can be done in seconds. No soldering or special skills are required. You simply attach it to your model and plug in a 1S battery (sold separately). A Y-harness connector is included if you want to eliminate the weight of a separate battery and power the camera with the same 1S flight battery that powers the aircraft. Features a full-fledged Fatshark set of Teleporter V4 goggles and a 25mw 5.8GHz VTX combined with a camera. Simply mount it to an existing airframe in your hangar and get your FPV on in style! Price- $299.99
TACTIC RCtacticrc.com, (217) 398-8970
DRONEVIEW FPV WIFI MINI CAMERA


If you’re looking to do a little recording from high above, but can’t swing the price of a full-blown FPV setup or perhaps you’d just like some HD footage of your FPV exploits, check out the new DroneView camera from Tactic RC. The DroneView is the mini-sized camera for any and all RCers, hobbyists or action video enthusiasts! It’s small and lightweight so you can attach it to your bike, board or virtually any RC model—and it’s First Person View-capable with the free DroneView app. Enjoy exciting videos and still shots, all at an affordable price. The DroneView Mobile App enables you to link your mobile device to the Tactic DroneView Wi-Fi Camera and instantly view a live feed. Record video and shoot still photos in real time. Export the video and pictures directly to your mobile device and easily share on popular social media websites. Adjust important camera features right from the app, such as brightness and contrast. For added versatility, the camera feed can also be seen and controlled by two devices simultaneously. Price- $79.99

2019年4月16日星期二

PRO-LINE PRO-MT 4×4 Monster Truck Review

A few years ago Pro-Line made huge news by releasing their very first truck, the PRO-2 SCT. Shortly on the heals of the PRO-2 was the PRO-MT, a truck that went on to become a Bash Vehicle Of The Year winner. Always a company to push the limits of technology, Pro-Line made huge news again this year with the announcement of their PRO-MT 4×4. While the 4×4 is sized much like the original 2WD PRO-MT, the 4×4’s all wheel drive system and stout looking parts are designed to take bashing to a new level. Did Pro-Line succeed? Is the PRO-MT 4×4 the best truck in its category? Is it a “works bike” level of rc truck? Keep on reading to find out…
From: Pro-Line Racing
Direct Link: PRO-MT 4×4 Monster Truck
Unboxing Pictures: BSRC Unboxes the PRO-MT 4×4
Ovonic power for Pro-MT 4x4
Review By: Cubby
Photography By: Tim Mohr
Specs:
RTR or Kit: Roller, assembled with no electronics
Age: 14+
2wd or 4wd: 4wd
Shaft or Belt: Shaft
Electric or Gas: Electric
Scale: 1/10
Length: 18″
Width: 14″
Wheelbase: 11.2″
Weight: 5.7lbs
Differential: 3 gear style diffs
Slipper Clutch: No
Driveshafts: Metal bones center, metal CVAs at the wheels
Shocks: Aluminum bodies, plastic caps, oil filled
Servo Saver: In steering rack
Screws: Metric, hex heads
Spur/Pinion Pitch: Mod 1
Bearings: Yes
Tires: Pro-Line Badlands MX28 tires, 17mm wheel hex
Battery: Not included
Part Number: #4005-00
Warranty: “Handled on a case by case basis”, contact Pro-Line customer service for more info
Bashing Specs:
Front wheel travel: 2.7″
Rear wheel travel: 2.7″
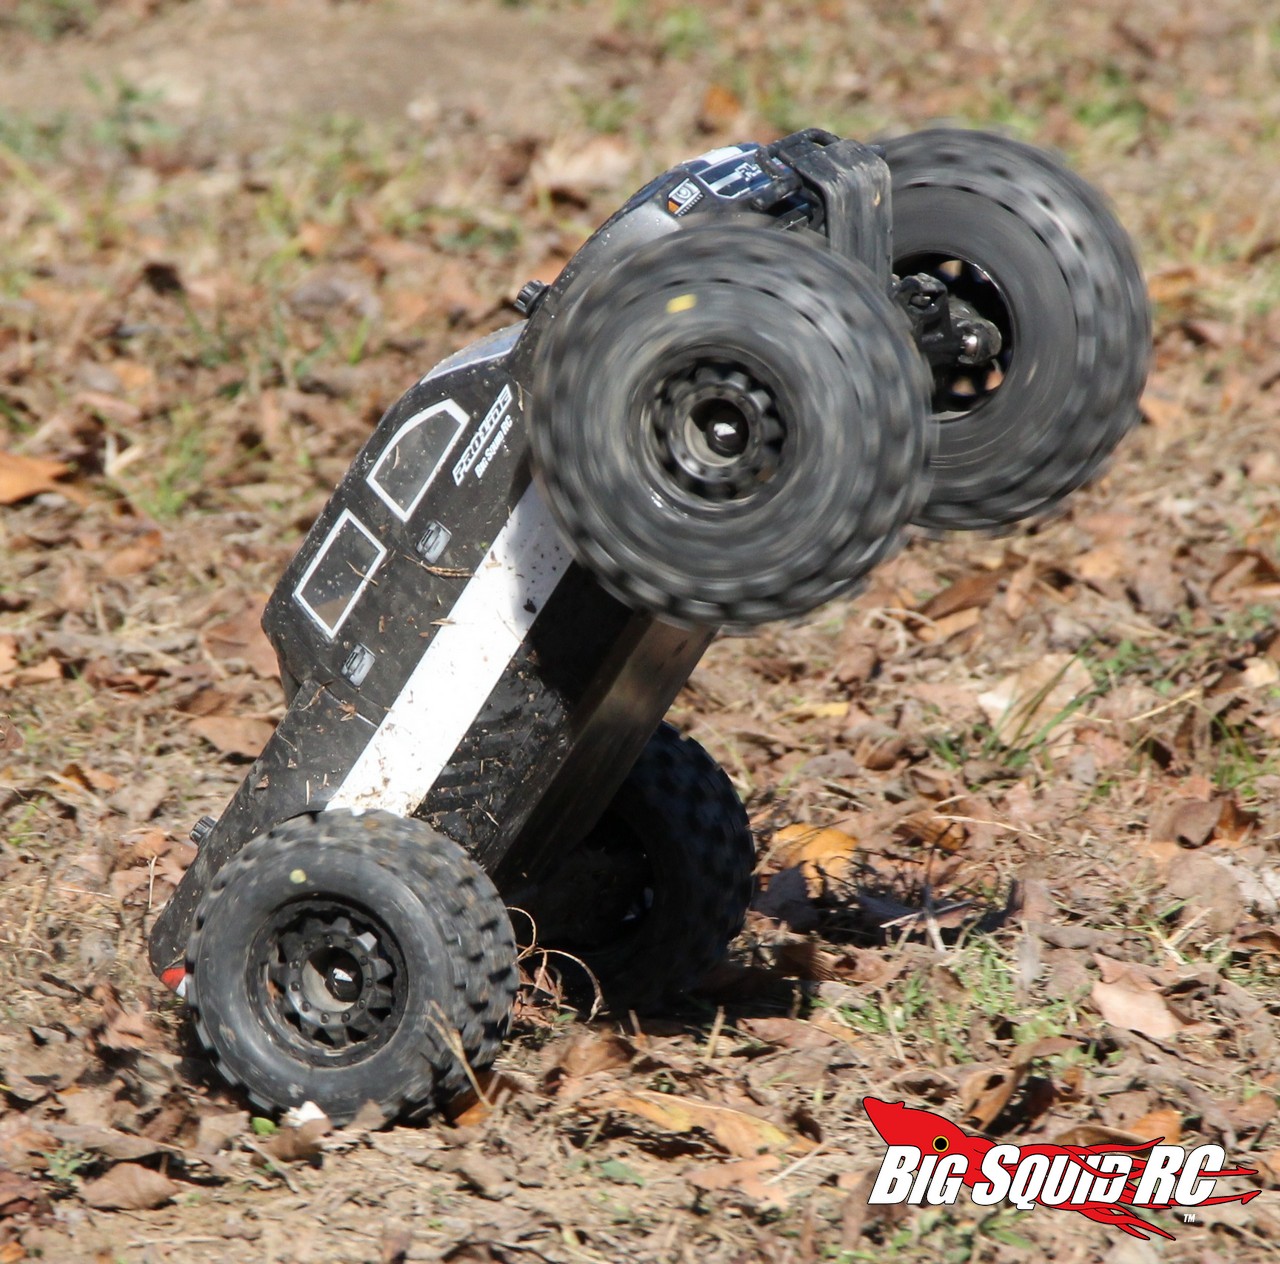
Wheelie on demand: Absolutely
Backflip off-ramps: Heck yea!
Stability Control: Up to you
Sound Module: Up to you
Self-Righting: It can by hitting the brake and gas
FPV: Up to you
Top Speed (measured by BSRC on 3S LiPo): 43 mph
Runtime (measured by BSRC on 3S MaxAmps LiPo): 18 minutes
Street Price: $399
Primary Competition: Whoa, the PRO-MT 4×4 jumps into shark-filled waters in the 1/10th 4wd monster truck class. Some of the heavy hitters include the Traxxas Stampede 4×4 and the ARRMA Granite 4×4.
What’s Needed To Complete: The Pro-Line comes as a roller, so you’ll need a full set of electronics. You’ll need a transmitter, receiver, steering servo, speedo, motor, batteries for truck and transmitter, a charger, and paint for the body. A pinion (with a sleeve) is supplied, as are three servo horns.
Build Quality: Our PRO-MT came in good shape. While ours was a pre-production unit, it was still built quite well.
Test Drivers: Iron “Full Throttle 24/7” Mikeee, Robbie Da’ Gangsta, Sam “I Hate Being Called A” Noobie, T-Mohr, Hawaiian Chris, and yours truly.
Test Venues: We got in a lot of trigger time with the PRO-MT. Speed runs were conducted in the parking lot of our local Costco. Trail, rock, and sand driving was done at Minnie Ha-Ha park in Fenton Missouri. We also busted out laps at the RC Outlaws 1/8th scale outdoor track in Collinsville Illinois.
Set-up Notes: So what did we used for electronics? We installed what we thought would be an uber set-up. For a transmitter, we used a new Futaba 7PX along with a Futaba R334SBS receiver. Steering was taken care of by a brushless Hitec 9360 servo. We serious power, a Castle Creations Mamba X speedo was used in conjunction with a sensor Castle 1415 2400kV brushless motor. MaxAmps supplied a 3S 5450 LiPo to power the truck and AA cells for the 7PX. Charging was handled by the easy to use Hitec RDX1. For paint, we used Duratrax gun metal and white.
Turning: With so many companies dialing a bunch of steering into their trucks nowadays, the PRO-MT 4×4 was much closer to neutral/slight understeer. Its slight amount of understeer going into corners made it easier to drive. At the apex, it felt very nicely balanced, with both ends sticking like glue (for a monster truck). Exiting a corner with the PRO-MT took a serious dose of self-control. Why is that? Because of it being a monster truck, giving too much throttle instant pulled the front wheels off the ground. It isn't rocketing science to know if the front wheels aren’t touching, they aren’t steering either. However, when we gave the truck a moderate dose of throttle the front remained steady and did a mighty fine job of pulling the truck out of corners like a miniature rocket.
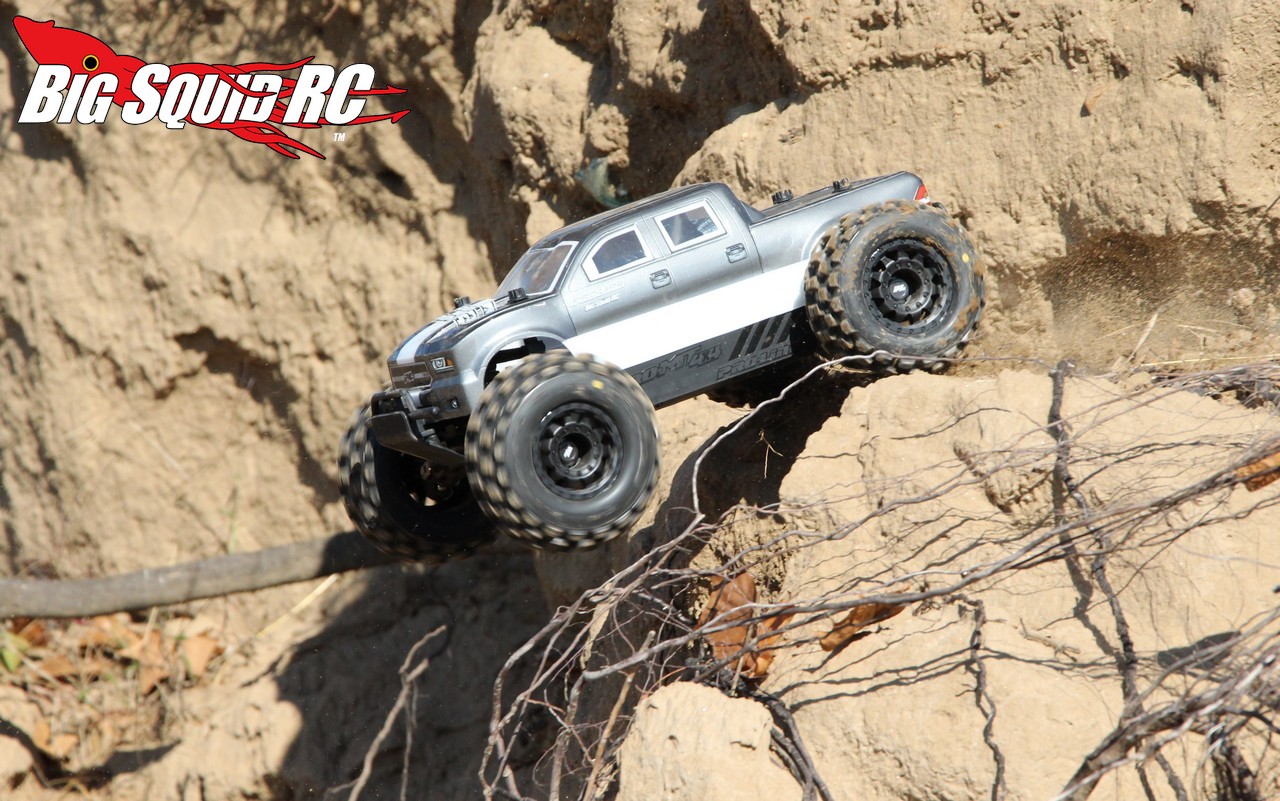
Jumping: We found the PRO-MT 4×4 to be excellent in the air. While some 4×4 monster trucks are too sensitive to corrective trigger inputs while airborne, the PRO-MT was not. This was thanks to its center differential. If you needed to drop the nose just a touch, a brief tap of the brake seemed to work perfectly. Some other trucks (those without a center diff) would totally endo-out with the same amount of input. Being so easy to jump helps the PRO-MT to give its driver confidence. We found ourselves hitting all sorts of crazy jumps. From back-flipping off of curbs, to giant 30-foot tall cliff jumps, we felt like no matter what we hucked it off of, that we could land it. The center diff helped, but so did its suspension settings and general suspension geometry. Both were excellent and provided clean, straight, take offs from most ramps. Its suspension also did an excellent job of soaking up big landings, even hard ones to the pavement that would bottom other trucks out like crazy.
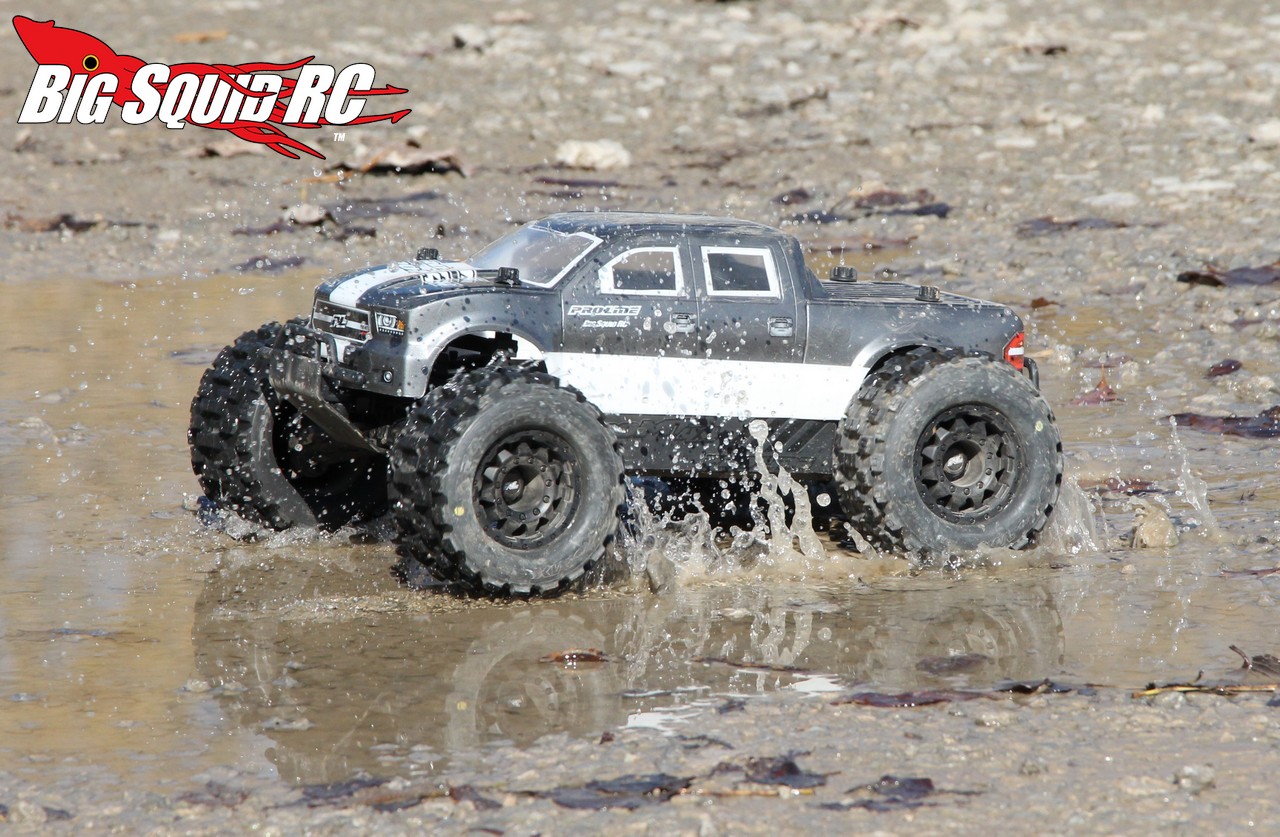
Bumps/Whoops: When flying through the all-sorts-of-ugly that we like to blast through, the Pro-Line proved to be one of the most capable trucks we’ve ever tested, regardless of scale. Yes, at warp 9.2 totally WFO, the rear would occasionally kick, typically straight up, when coming off the gas in the rough. Otherwise, if you kept on the throttle, it would absolutely pound through the rough stuff. Hard on the gas, the truck would tend to raise in the front. This helped the leading edge of the truck float simply over rough patches, just leaving the rear to really slam into the rut or whoop. The weight bias of the truck favored fast rough stretches, just like its rear shock settings. Truly, we found the Pro-Line to be an amazing truck over whoops, rain ruts, and even over sticks/rocks/dirt clods on a trail.
On-Road: We didn’t do as much pavement driving with the Pro-Line as we do most test trucks, but that was because we were always itching to keep driving it on dirt. Still, we managed to drain two packs on-road and found the PRO-MT to be what it really is, a monster truck designed for off-road driving. No, the PRO-MT wasn’t bad on-road, but it drove like you would expect, it traction rolled when hitting corners too fast and always had its nose in the air when pounding the throttle.
Grass: As you will read directly below in the “tires” portion of our review, those wonderful Badlands MX28 tires do a great job in the grass. In fact, they are probably the best tires that money can buy for grass driving. Those tires, combined with a more than capable chassis and 4wd driveline, allow the PRO-MT 4×4 to be top notch in the grass. The tires provide loads of forwarding and side bite, chewing through grassy like a champ. We know a whole lot of you bashers only drive on grass, if that is your M.O., the PRO-MT 4×4 is easily one of the best trucks you can buy.
Tires: Years ago in a face-to-face meeting that we had with Pro-Line, they asked us if there was anything that we would like to see them make. One of our many answers was “fully licensed motocross tires, but for RC trucks”. While the MX28 tires are not licensed by one of the motocross tire companies, they do sport a full-on motocross tread pattern. Motocross bikes have been using that style of knobby tires for decades, and guess what? Yup, they work equally well on an rc truck. Now, most bash trucks came with decent tires. Tires that don’t wear out too quickly, yet get a reasonable grip on a wide variety of surfaces. Pro-Line is much different. It comes out of the box sporting the Best off-road bashing tires that money can buy. The MX28s are simply outstanding on loose/loamy/clod-filled dirt, gravel, and grass. They provide more traction than any other tire you can buy, therefore giving the PRO-MT 4×4 a huge advantage over other trucks in its category. Ya, you might change the tires later on if you specifically drive on pavement or sand. Otherwise, unless you wear the MX28s out, you can count on them being the best shoes in the business for a bash truck.
Power: No, the Pro-Line doesn’t come with a power system, but we would like to mention the system we installed. The PRO-MT allows you to mount up a wide variety of power systems. If you have a 550 size short course truck system laying around, it will work. If you have a system for a 1/8th scale buggy/truggy, that works too. We went with a Mamba X and 1415 as we felt it was more than enough raw wattage for a truck the size of the PRO-MT 4×4, and we knew it would run cool and last a long time. That system was sensored, so even throttle precision from a dead stop was top notch. Sure, some of you guys might bolt in full 1/8th scale power systems, but that really is overkill. Also, we only used 3S in our test truck. Even at that cell count, we knew we would have insane power and the Castle system did not disappoint. 1415 absolutely loves being run on 3S and it did a fantastic job of powering the truck.
Radio: The Pro-Line doesn’t come with a transmitter either, but because we are simultaneously working on the Futaba 7PX review, that’s what we installed. Needless to really say, the 7PX is the absolute BOMB and was a perfect match for a high-end bash truck like the PRO-MT 4×4.
Broken Parts: What did we bust up on our review truck? While we did have a couple of little pre-production issues on our test unit, overall it held up well. We never broke an arm or tower, and all three diffs are still alive and well. After bashing the truck properly, like the BSRC Bash Crew knows how to do, it did finally stop running after one of the plastic inserts on the front pillow balls melted and caused one of the front wheels to stop turning. Otherwise, our test truck has taken a ridiculous beating and kept on ticking.
Misc Notes:
Oh yes, we love our miscellaneous notes here at BSRC. LOL. We are going to start off with the bumpers. Both were extremely well designed with crush zones, this allows them to actually help soak up a hit without any parts breakage.
You’ll notice when taking a look around the PRO-MT 4×4 that there are lock nuts everywhere. That is not only awesome but also helps keep the truck together, even under extreme usage.
Is the design and build quality a “step up” from the other brands? In our opinion, the answer is yes. From the tip of the front bumper to the end of the rear, every part looks to have been designed with extreme bashing in mind. Of course, you can break any truck if you hit something hard enough, but it appears that the design team went to great lengths to provide plenty of beef on the PRO-MT 4×4. The aluminum parts like the shock bodies, chassis, and motor mount, were also well done, just like the plastic parts.
While we didn’t have any issues with the plastic shock caps, we would rather have seen them made from aluminum. As most of you guys already know, plastic caps can be a nightmare, thankfully that hasn’t been the case so far with the Pro-Line.
We had the rear sway bar pop off one of the rear arms. As ours was a pre-pro unit, we got with Pro-Line and they recommended moving the pivot ball 2mm further out on the sway bar and that solution worked well for us.
The PRO-MT 4×4 comes with beefy 17mm wheel hexes. That is a great thing for durability but prevents you from mounting up wheels with a standard sized hex (12mm). No need to worry though as Pro-Line has already produced plenty of wheels with a 17mm hex to fit the 1/10th scaled PRO-MT 4×4.
We were fans of the motor mount, but not the way it mounted. The Pro-Line unit works fine, and is actually really awesome when used with a 1415 because it also supports the rear of the motor (but the support must be removed if you install a 1/8 sized unit). However, its downside has to do with its mounting screws. The motor mount uses small spacers to determine the gear mesh. If you are super organized you will be fine, but we have already lost most of the gear mesh/motor mount spacers in our giant mess of a toolbox.
Those shocks! Wow, we were very impressed with the action of the shocks on the truck. Initially, we thought they would be too soft for the power system that we installed, but that was not the case. With our Mamba X/1415/3S system, the truck was sprung and damped quite well. The shocks were soft enough to swallow small bumps with ease and to provide loads of traction on loose surfaces, yet they were stiff enough to pound through whoops and not bottom too hard on big jump landings. Very impressive.
As always, we were huge fans of the Pro-Line Secure-Loc body mount screws. These are a zillion times better than body clips for both ease of use and for not getting lost.
What was it really like driving the PRO-MT 4×4? Well, yes, it was a bit like having a full factory works bike in our hands. It just seemed like the suspension worked better than most other brands. It also seemed like it cornered better, and it just felt smoother than most other brands. Smooth, precise, and confidence inspiring, that is how we would best describe driving the PRO-MT 4×4.
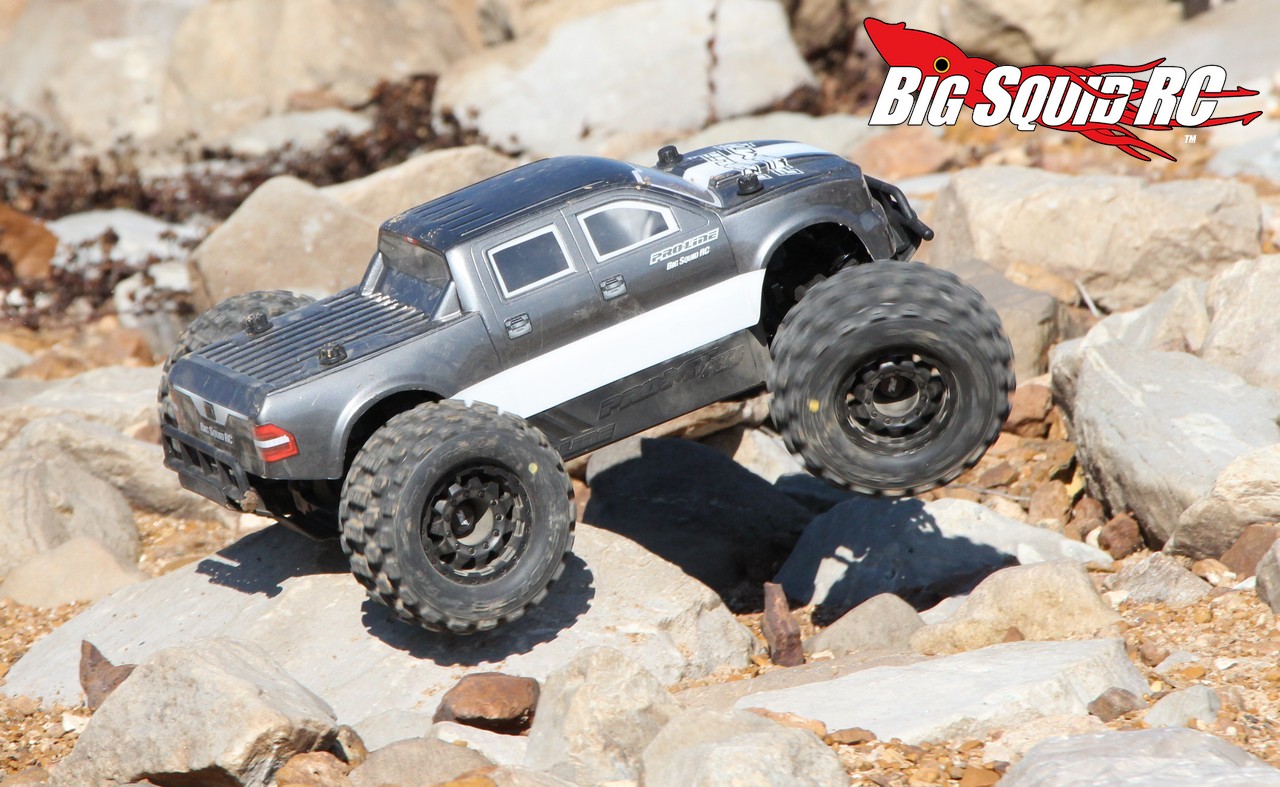
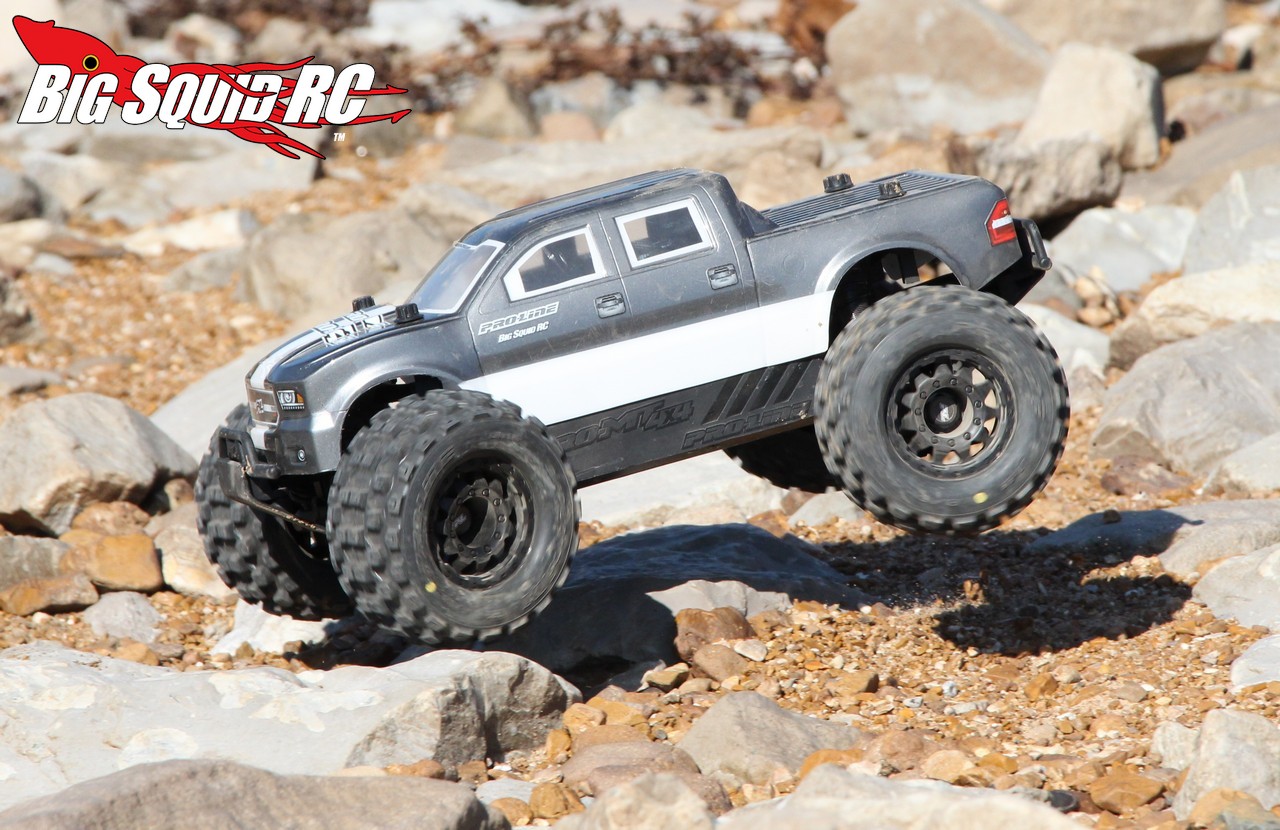
Our test crew really like the Sentinel body. It has a tough, proper look for a truck like the Pro-Line.
We are big fans of rollers here at BigSquidRC. Why? Because, just like many of you, we have a zillion electronics laying around the office. Why pay for RTR electronics when most experienced hobbyists are most likely going to ditch them anyway?
The servo saver on our truck came too tight. We loosened it up 2 full turns and now it works much better.
At 2.7″ front and rear, the Pro-Line has a LOT of suspension travel. This allows the truck to tackle rough sections, or big jump landings, like a champ.
Much like the 2WD PRO-MT, the 4×4 comes with tall side guards to keep dirt/junk/rocks/sticks out of the chassis area. We found that the guards actually worked quite well. No, they didn’t keep everything out, but they did help keep a lot of extra dirt out of the chassis area.

2019年4月9日星期二

How to Build a FPV Drone Beginner Guide

n this tutorial I will show you how to build a racing drone (aka FPV mini quad) from scratch step by step. It walks you through what components you need, how to assemble the quadcopter, and configure the software for your first flight.

Can Beginners Build an FPV Mini Quad?

Absolutely YES!
There are pre-built drones you can buy off the shelf, but you are not going to learn anything. By building a quadcopter, you know exactly how everything fits together and how to repair it later on.
It’s going to be hard building your first drone, it could take hours, or even days to finish. When you encounter a problem, you might take advice from experienced pilots, or ultimately end up finding your way by trial and error. Either way, the journey is going to be extremely rewarding.
I wrote this tutorial back in 2017, and I have been constantly updating it to cover as much detail as possible, while trying to keep it simple so any beginners can easily follow. My goal is to teach you the steps and basic knowledge of building and setting up a mini quad.
There are a million ways to build a mini quad, different builders might use different steps, tools and techniques. But the goal is the same – building a racing drone that is reliable! And don’t be afraid to do things differently, as long as it works for you.

Learning the Basics

Before we begin, please make sure you’ve read this tutorial to get a basic understanding of mini quad and FPV in general: How to get started with Drone Racing and Mini Quad
if you see an abbreviation and have no idea what it means, you can try looking it up here: Acronyms and technical terms in FPV.

Table of Contents

  • Racing Drone Parts List
  • Tools and Accessories fpr Building
  • Steps to build this Quadcopter
  • Videos
  • More DIY Builds
  • Pre-built Drone Recommendation

Mini Quad Parts List

For this tutorial, I will be using the following parts in “Primary Options” column. I also listed alternatives.
PartsPrimary OptionsAlternatives
FrameMartian II Speical Edition ($20)Martian II
FCKakute F7 AIO
ESCHolybro Tekko32 35A ($64)RacerStar RS30A V2 ($52)
MotorDYS Sunfun 2207 2400KV ($12)
PropellerHQ 5.1×4.1×3 ($)DAL Cyclone T5045C ($3)
RXFrsky XSR ($17)Frsky R-XSR ($25)
FPV CameraRuncam Micro EagleRuncam Eagle 2 ($45)
VTXEachine VTX03 ($10)Holybro Atlatl V2 ($30)
FPV AntennaFoxeer Lollipop V2Aomway Cloverleaf
Misc PartsXT60 Pigtail ($1.5)
Buzzer ($0.4)
IntoFPV Battery StrapBG Battery Strap
OptionalLow ESC Capacitor ($1.5)
Spare Nylon Standoffs
If you want to see other mini quad parts that I have tested and recommend, check here: https://oscarliang.com/tag/recommend/

Frame

The Martian II frame is a great value frame. I am still flying the one I bought back in 2016, the oldest frame in my fleet. It’s very roomy and easy to build, you can’t go wrong with the Martian II as your first mini quad frame.
By the way, I have a coupon here, FiberRC, you can get the Martian on this page for only $16.8. Expires in June 2019.

FC – Flight Controller

I like the simplicity of “AIO” (All in one) flight controllers, it combines the FC and PDB into one single board, which minimizes the amount of wiring and soldering.
The Kakute F7 AIO FC has been one of the most reliable flight controllers for me. You don’t need to worry about soft mounting because the Gyro is separated from the board by vibration damping foam. It features a powerful F7 processor that allows you to run all the latest features in Betaflight and still has enough processing power to run fast looptime.

Motors

The DYS Sunfun 2207 2400KV motor is one of the best value motors I’ve tested. FPV Beginners are going to crash a lot, and motors take the most impact so if you break them it won’t hurt as much.

ESC – Speed Controller

As your first build, I would steer away from 4-in-1 ESC’s. They might be easier to work with, but if you burn out one ESC then you are screwed. It stinks that you have to replace the whole board.
That’s why it’s better to use standalone ESC’s, price difference is minimal anyway. My go-to standalone single ESC’s right now are the Tekko32 35A. They are BLHeli_32 ESC’s, capable of running 48KHz PWM frequency and DShot1200, making them more superior than the older BLHeli_S ESC in terms of performance.

Receiver

Your choice of radio transmitter determines what receiver (RX) you are going to use. For Frsky Taranis users, both the XSR and R-XSR are excellent choices.
XSR and R-XSR have the same features and range, but the R-XSR is smaller and lighter. Size is really not an issue for the roomy Martian frame, so you might want to consider the XSR because it’s slightly cheaper than the R-XSR. Anyway, it really doesn’t matter.

VTX

I am using the Eachine TX805 VTX in this build, simply because it’s cheap and has got all the features I ever need in a VTX! It has SmartAudio, selectable power levels range from 25mW to 800mW, MMCX connector, and a built-in Mic.

FPV Camera

The Runcam Eagle 2 is simply the best “All-Around” FPV ever made, excellent performance in both day and low light. They also make a smaller version, the Micro Eagle. But yes, the Martian only takes full size cameras, but you can get this adapter so you can mount a micro camera just like a full size camera.
There are cheaper FPV cameras, but being able to see well in your FPV goggles makes a huge difference in your confidence and how well you can fly.

Propellers

Most racing drone propellers these days are made of Polycarbonate plastic, which means they last much longer! My personal favourite props for this build are the DAL Cyclone 5045×3, and HQ 5.1×4.1×3. Get whichever prop you can find.

Other Equipment for Flying

You will also need to have the following accessories in order to fly a quadcopter. If you don’t already have these, take a look at my shopping guides to get some ideas what to buy.
A Radio Transmitter for controlling the drone, here is my Buyer’s Guide. My recommendations right now (2019) are the Jumper T16Taranis QX7 and Taranis X9D.
A pair of FPV Goggles for watching real-time video from the drone, here is my Buyer’s Guide. My recommendations (2019) are the Skyzone Sky03, or the Fatshark HDO with Pro58 Module.
Some 4S 1300mAh or 1500mAh LiPo Batteries. There are quite a lot to learn about LiPo in this Buyer’s Guide, because if you don’t handle them carefully they can be dangerous. See this post for our FPV LiPo Battery Recommendations.
Finally, you need a battery charger, you can learn about the specs in our Buyer’s Guide. And here is our LiPo charger recommendations.

If the wrong channels are responding, try a different channel map, it’s normally either “default (AETR)”, or TAER.
You will need to setup at least two switches on the Taranis (instruction) for arming and enabling “lost model beeper”. Again, confirm it’s working in the receiver tab, these should show up as channels AUX1 and AUX2.
Next you want to test if SmartPort is working. You can do this by simplying go to the telemetry page on the Taranis. plug in the LiPo, and the LiPo voltage should be displayed under “VFAS”. If you don’t see “VFAS”, then scroll down and select “Discover new sensors…”.
And finally setup and test failsafe (instruction) on the receiver.
If you have any questions or issues, post in our forum: intoFPV.com

8. Connect FPV Camera and VTX

Let’s move on to our FPV system.
Solder both cables from the VTX and FPV Camera to the flight controller. I am powering the VTX directly from LiPo voltage (BAT), and the camera from 5V. SmartAudio from VTX is connected to TX1.
Pro tip – twisting cables this is a great way to help reduce unwanted RF noise.
Power on the quad with Smoke Stopper, to test make sure you are getting a clear picture on your goggles. Since the VTX is brand new, it could be on any channel. Use the “search feature” on your FPV goggles to find it, or simply scroll through all channels.
Here are instructions on how to setup SmartAudio so you can change VTX settings in Betaflight OSD.

9. Installing Buzzer

Solder the buzzer to the FC: Buzzer positive goes to 5V, Buzzer negative goes to Z-.
To mount the buzzer in the frame, you can use the same trick we used on the capacitor earlier – double-sided foam tape :) Don’t block the hole though!
Stick it to the frame, then wrap around it to a standoff with electrical tape .

10. Using 3D Printed Parts

Most things are open source in the FPV hobby, including 3D printed parts for our quads! You can find lots of useful 3D printed part designs online.
While 3D printed parts are not necessary, they can be very useful.
I designed these 3D printed parts specifically for the Martian II frame, they make the build so much cleaner! If you don’t have a 3D printer, I can print and send them to you, get them here.

11. Mounting Receiver Antennas

The XSR and R-XSR receiver have two antennas for diversity. For the best result, keep the two antennas at roughly 90 degree.
Here is a trick for mounting your RX antennas: you can wrap a zip-tie around the arms, then use heatshrink tube to affix the antenna to the zip-ties to keep it away from spinning propellers.
 

12. ESC Protectors

Another useful trick is adding some covers to your ESC’s using plastic sheets. This will prevent “prop strike”, where spinning propellers get bent and hit the ESC in crashes.
I normally just recycle old props, cut them into rectangular shapes and put them on top of the ESC, wrap the plastic cover, ESC and arm with electrical tape, or zip-tie. You can also get the plastic covers from water bottles, or any plastic sheet you can find :)
 
Here is how the quad looks like so far.

13. Top Plate and Battery Mounting

We can now put the top plate on. I am installing an HD camera mount on top of the frame for my GoPro Session. The camera mount is 3D printed in TPU. If you don’t have one you can ignore it.
For mounting the battery, I am using a IntoFPV battery strap, and Ummagrip battery pad. I really like the Ummagrip, it keeps your battery safely away from the bolts, and it sticks to the battery really well. Alternatively you can just use the good old velcro.
When mounting battery, make sure the centre of gravity is as close to the centre of the drone as possible. To check if you have placed the battery at the right spot, simply grab the middle of the top plate with 2 fingers as shown in the following photo, and the quad should stay level.
It’s important to make sure the COG (centre of gravity) right at the centre of four motors. If the quad is back heavy for example, the rear motors will have to work harder than the front motors in order to maintain balance, and this will impact flight performance.
The XT60 pigtail is held in place by a 3D printed mount I personally designed. A very neat and practical solution.
If you don’t have 3D printed part, you can simply strap it to the top plate like so with a heavy duty zip tie. (make sure you’ve chamfered the edge of the top plate). It’s not very pretty, the goal is to keep your battery lead away from spinning propellers.
Pro Tip: Don’t leave the battery balance lead hanging around, it can get chopped up by propellers. I usually put a rubber band on the battery to hold the balance lead in place.